

Alter connects to Discord as a bot using a bot token. You create the bot in the Discord Developer Portal; Alter does not generate an invite URL for you — you add the bot to your server from the portal.
始める前に
- アプリケーションを作成する (およびターゲット サーバーにボットを追加する) 権限を持つ Discord アカウント。
- Alter が Mac にインストールされ、実行されています。
- トークンと ID をコピーするのに数分 — ボット トークンをパスワードのように扱います。
ステップ 1 — Discord アプリケーションを作成する
1
Open the Developer Portal
Go to discord.com/developers/applications and sign in.
2
New Application
Click New Application, choose a name (for example 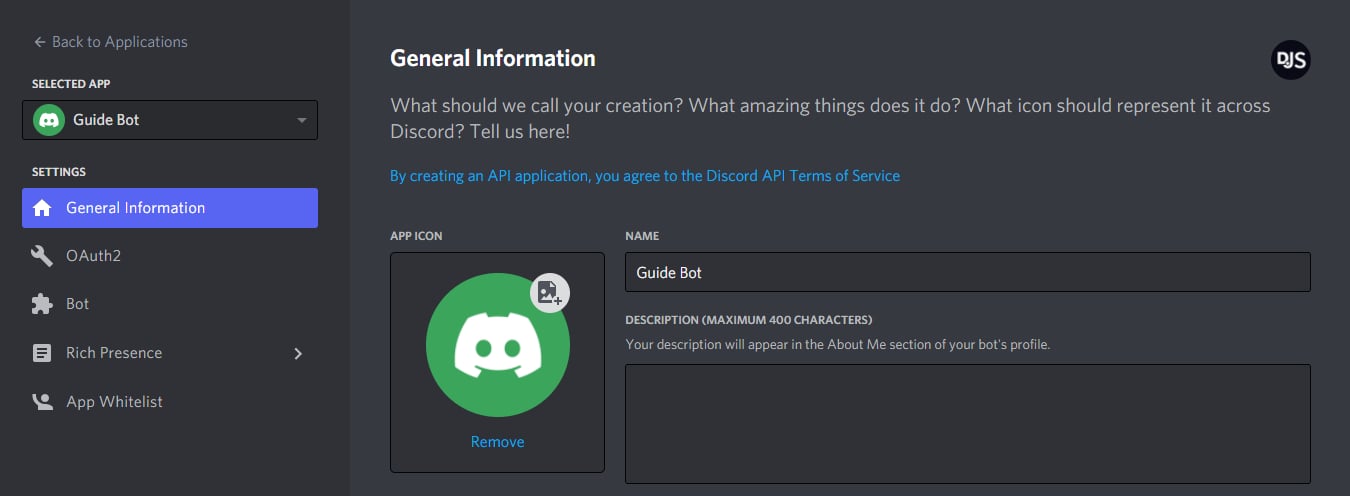
Alter), and confirm.3
Open the Bot page
In the left sidebar, select Bot, then click Add Bot (or Reset Token if you already created one).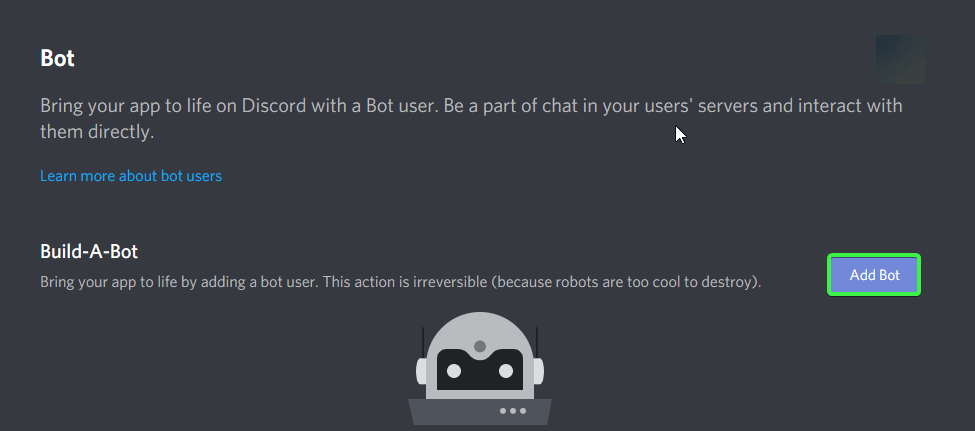
ステップ 2 — Message Content Intent を有効にする
Alter はサーバーと DM のメッセージ テキストを読み取る必要があります。 Discord では、Developer Portal でこれを明示的にオンにする必要があります。1
Open Bot settings
In your application, go to Bot.
2
Enable Message Content Intent
Under Privileged Gateway Intents, turn on Message Content Intent.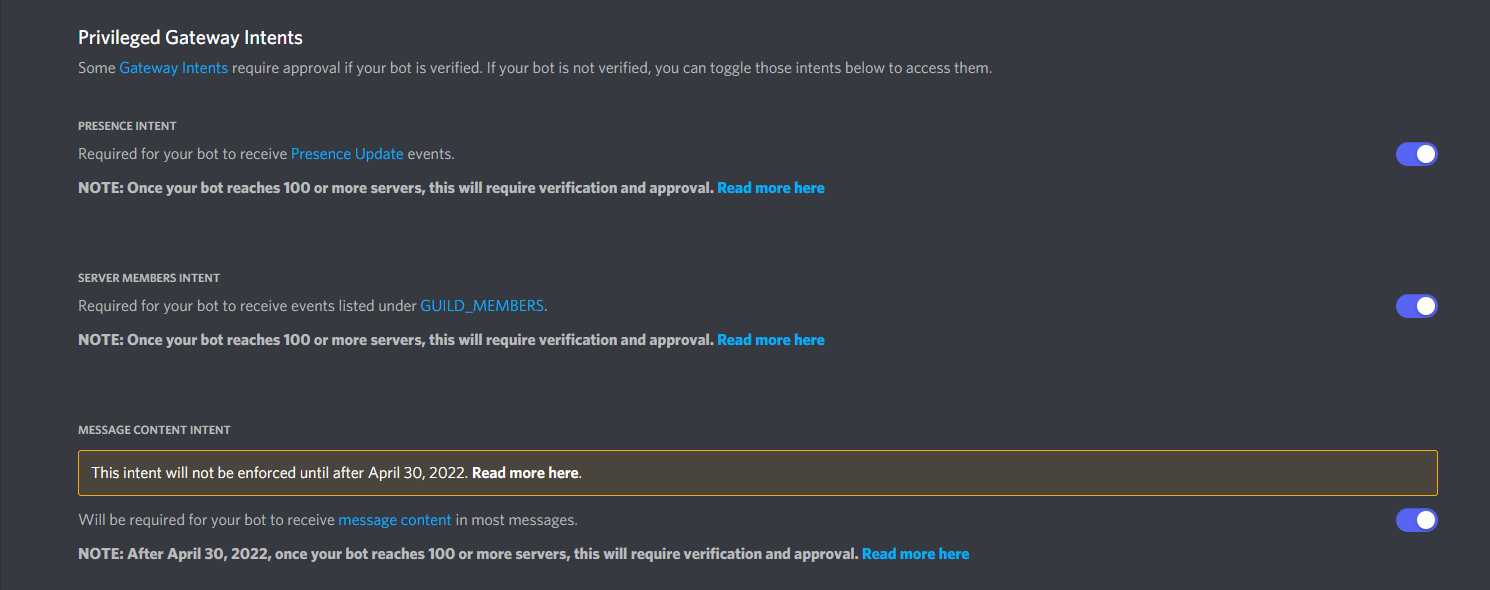
3
Save changes
Confirm any prompts. Without this intent, Alter cannot read messages and shows an error such as Enable Message Content Intent for this bot.
ステップ 3 — ボット トークンをコピーする
1
Reveal the token
On the Bot page, click Reset Token (first-time setup) or Copy under Token.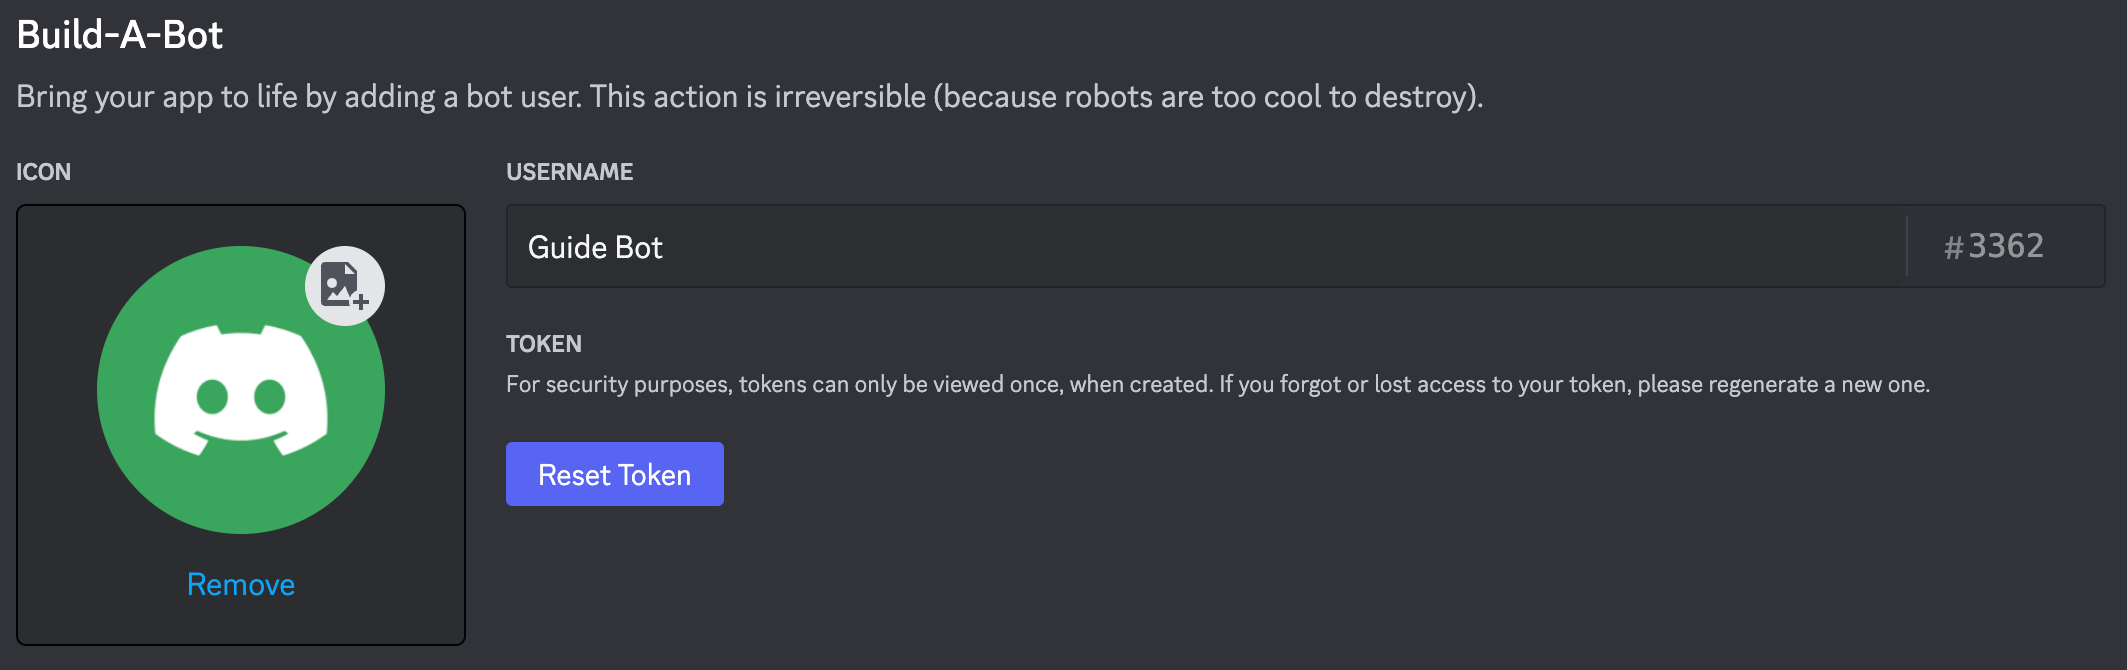
2
Store it securely
Paste the token somewhere safe temporarily — you will enter it in Alter in a later step. If it leaks, use Reset Token in the portal and update Alter.
ステップ 4 — ボットをサーバーに招待する
Alter はアプリ内に招待リンクを構築しません。 Developer Portal で 1 つを生成します。1
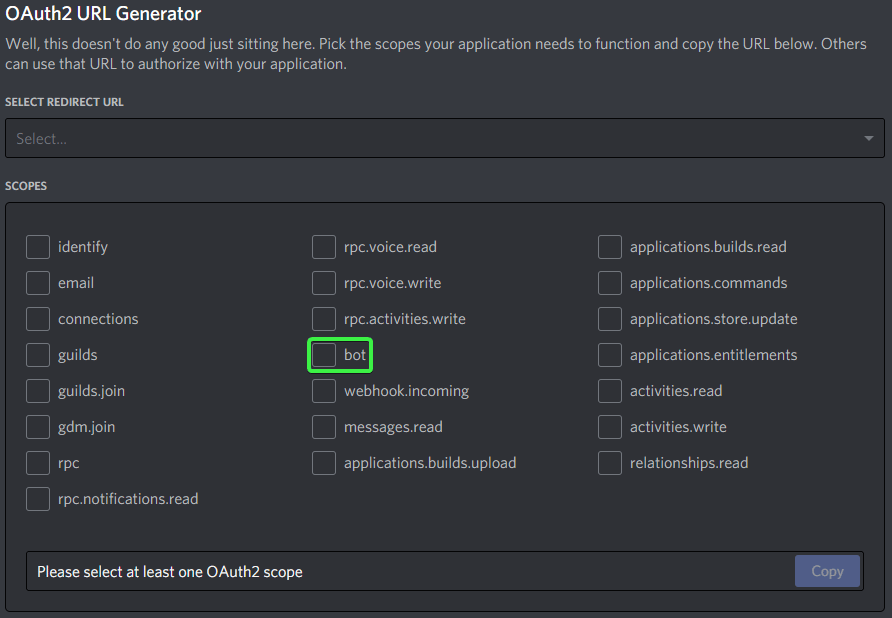
Open OAuth2 URL Generator
In your application sidebar, go to OAuth2 → URL Generator.
2
Select scopes
3
Select bot permissions
Under Bot Permissions, enable: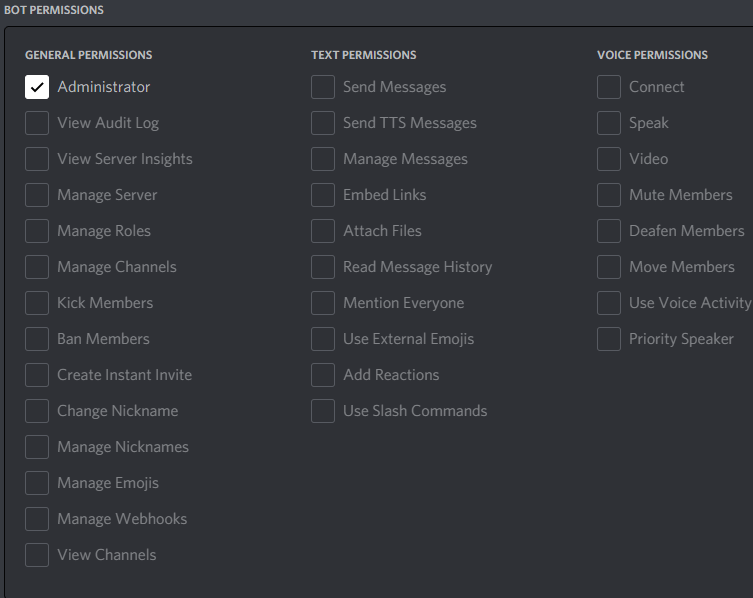
- View Channels
- Send Messages
- Read Message History
- Attach Files
- Create Public Threads and Send Messages in Threads (optional — only needed if you enable サーバーでの議論をスレッドで開始 in Alter)
4
Copy and open the generated URL
Copy the URL at the bottom, open it in your browser, choose your server, and authorize the bot.Discord documents this flow in Adding bots to servers.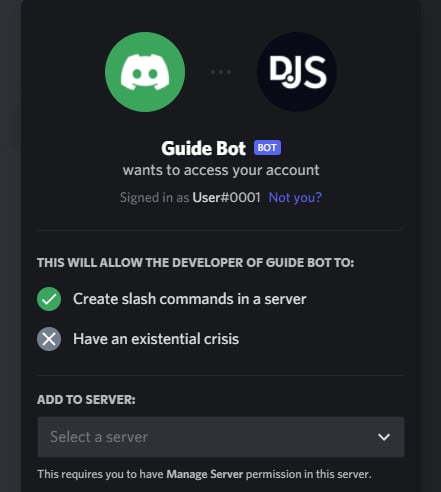
ステップ 5 — オプション: サーバー ID とユーザー ID をコピーします
Alter と通信できるサーバーまたはユーザーを制限したい場合は、これらを使用します。1
Enable Developer Mode in Discord
In the Discord client: User Settings → Advanced → Developer Mode → on.See Discord’s ID documentation.
2
Copy Server ID
Right-click your server icon → Copy Server ID. Paste this into Alter’s サーバー ID(任意) field to ignore messages from other servers.
3
Copy user IDs
Right-click a user → Copy User ID. Use comma-separated IDs in 許可された Discord ユーザー ID to allow only those people.
Alter で接続
1
Gateways 設定を開く
設定 (⌘,) → Integrations → Gateways を開きます。他の開き方は Gateways 概要 を参照してください。
2
Discord Gateway を追加
Gateway を追加 → Discord をクリックします。Alter がリストに新しい Gateway エントリを作成します。
3
接続フィールドを入力
Connection セクション下部の Discord Gateway セットアップガイド リンクで、このページをブラウザで開けます。
4
デフォルト Action とスレッド動作を選択
Ask Anything がデフォルトで、Discord ですぐ使えます。カスタム Action には Action Editor → Gateways で 可用性 を Discord または すべて に設定します。動作 では、新しい Discord Gateway では サーバーでの議論をスレッドで開始 がデフォルトでオン — 各新しいサーバートップレベルメッセージに専用 Discord スレッドと Alter チャットが付きます。既存スレッド内のメッセージはそのチャットを継続します。DM は変わりません。メインチャンネルで返信したい場合はオフにしてください。オンのまま使う場合は、ボット招待時(ステップ 4)に Create Public Threads と Send Messages in Threads を付与してください。
5
有効化して保存
有効 をオンにし、保存して再起動 をクリックします。接続済み bot … や @… として接続済み などのステータスを待ちます。
ボットをテスト
1
Alter が実行中であることを確認
Gateways は Alter が Mac 上で開いている間のみ動作します。
2
/help を送信
DM またはサーバーチャンネルで
/help を送信(または Discord の /help slash コマンドを使用)。bot がコマンドを一覧表示し、New chat、Choose action、Past chats ボタンを表示するはずです。3
メッセージを送信
通常メッセージを送信(サーバーでメンションを必須にする がオンのサーバーでは bot を
@mention)。Alter は 👀 で反応し、Thinking… を表示してから回答をストリームし、完了時に ✅ または ❌ で反応します。4
Web 検索の書式を確認
アクティブな Action が Web 検索を使う場合、Discord の返信には生 markup ではなく、明確に整形されたソースリンクが含まれます。
5
/new を試す
/new で デフォルト Action の新しい会話を開始、または /new ask-anything で特定の Action ID を指定。6
音声メッセージを試す
Discord ボイスメッセージ を送るか、音声ファイルを添付します。Alter は選択した音声プロセッサ(設定 → Voice)で文字起こしし、テキストをアクティブ Action に送ります。