The problem: AI models don’t know your voice or writing style. They’re trained on millions of texts from thousands of writers. To scale your writing without sounding generic, you have to give Alter the knowledge of who you are as a writer.
Why generic AI output doesn’t sound like you
When you ask an LLM to write something, you’re asking a system trained on hundreds of thousands of voices to guess what your voice sounds like. It doesn’t know that you prefer short sentences over long ones. It doesn’t know you lean conversational instead of formal. It doesn’t know the perspective or tone that makes your work distinctly yours. Each time you use an AI to help with content, you either:- Accept generic output and spend hours editing it back to your voice
- Manually explain your style and tone every single time
- Stop automating because the overhead kills your productivity
The real solution: teach Alter who you are
Instead of re-explaining your voice every time, you encode it once into a custom skill. This skill becomes a permanent reference that tells Alter exactly how you write. Then you isolate it in a workspace with your project files, and activate it instantly with a mode. Now scaling your output means quality stays consistent because Alter isn’t guessing - it’s following your actual style. This isn’t about convenience. It’s about making productivity possible without diluting your voice.How it works: giving Alter the knowledge it needs
1. Custom skills teach Alter your voice A skill contains your writing samples, tone guidelines, formatting rules, and preferences. Instead of Alter trying to infer your style from thin air, it has concrete examples of how you write. It references these samples every time it helps you, so the output stays true to your voice. 2. Workspaces give Alter context about your work When you link your blog repository or project folder to a workspace, Alter understands your structure, your conventions, and how you organize things. It’s not starting from zero - it knows your actual ecosystem. 3. Modes make activation automatic Modes let you switch into “Blogging Mode” with a single hotkey. Your workspace loads, your skill activates, your context is ready. No setup, no thinking - just write.Step-by-step: teaching Alter your voice
In this workflow, I demonstrate how I codified my blog creation process including capturing my writing style as a skill, then using Alter to automate blog post creation through the use of Workspaces and Modes. While this tutorial shows how I set up my workflow for blogging, you can apply these principles to any type of writing or content creation.1. Create a workspace (start here)
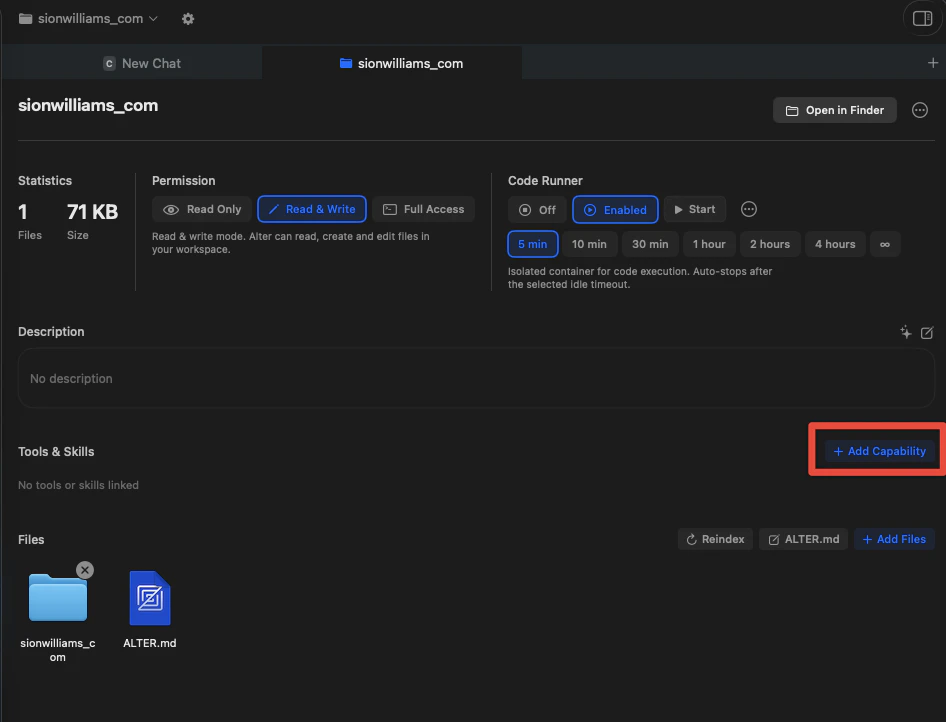
Your workspace is the foundation. Create it first so you have a dedicated context for your style skill to work with.
Link your project folder
Select your blog repository, or any folder containing your content structure.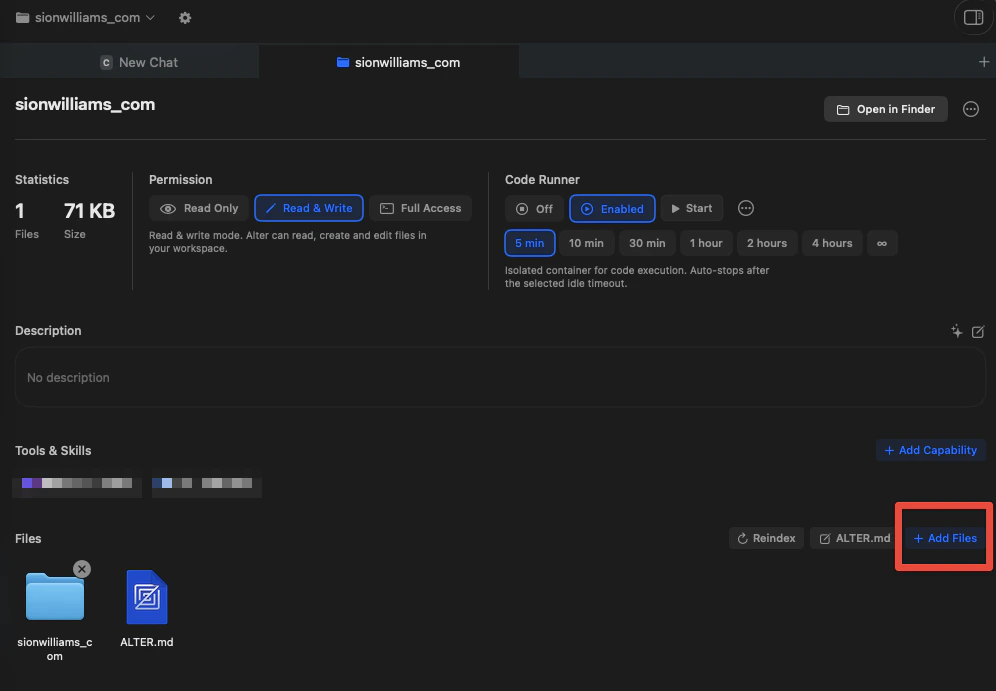
2. Create your custom blogging skill
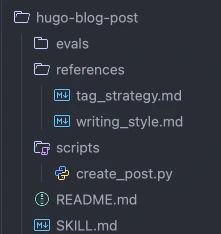
Now that you have a workspace linked with your project context, we create a custom blogging skill. There are plenty of resources online explaining how to create a custom skill, so I won’t go into that here. Instead, I will provide some references to get started below. Instead here’s a picture of my skillfolder structure, and some screenshots of what is contained in mySKILL.md.
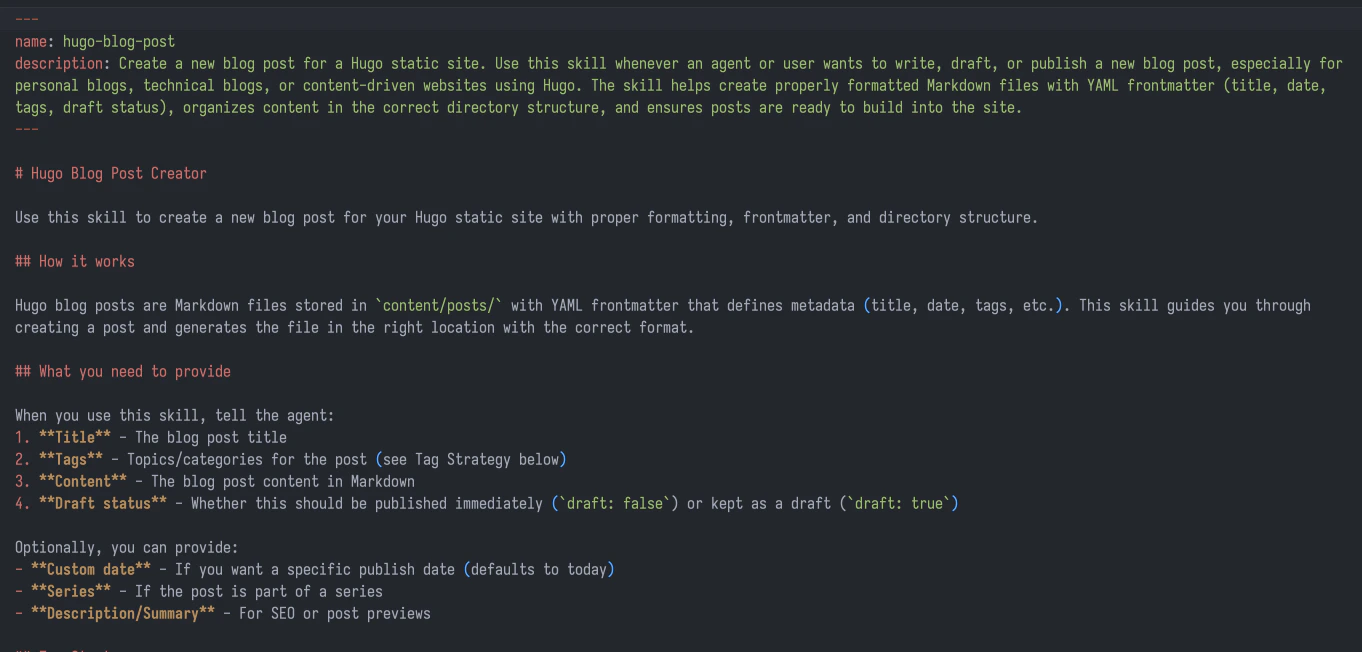
SKILL.md file acts as the instructions binding everything together.
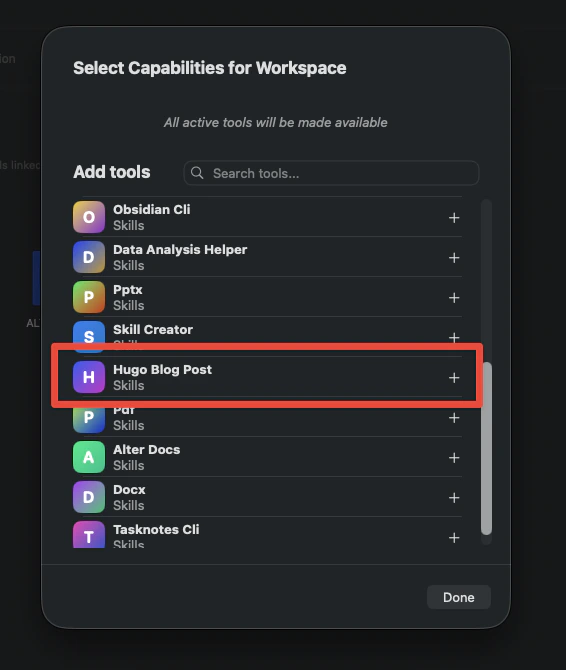
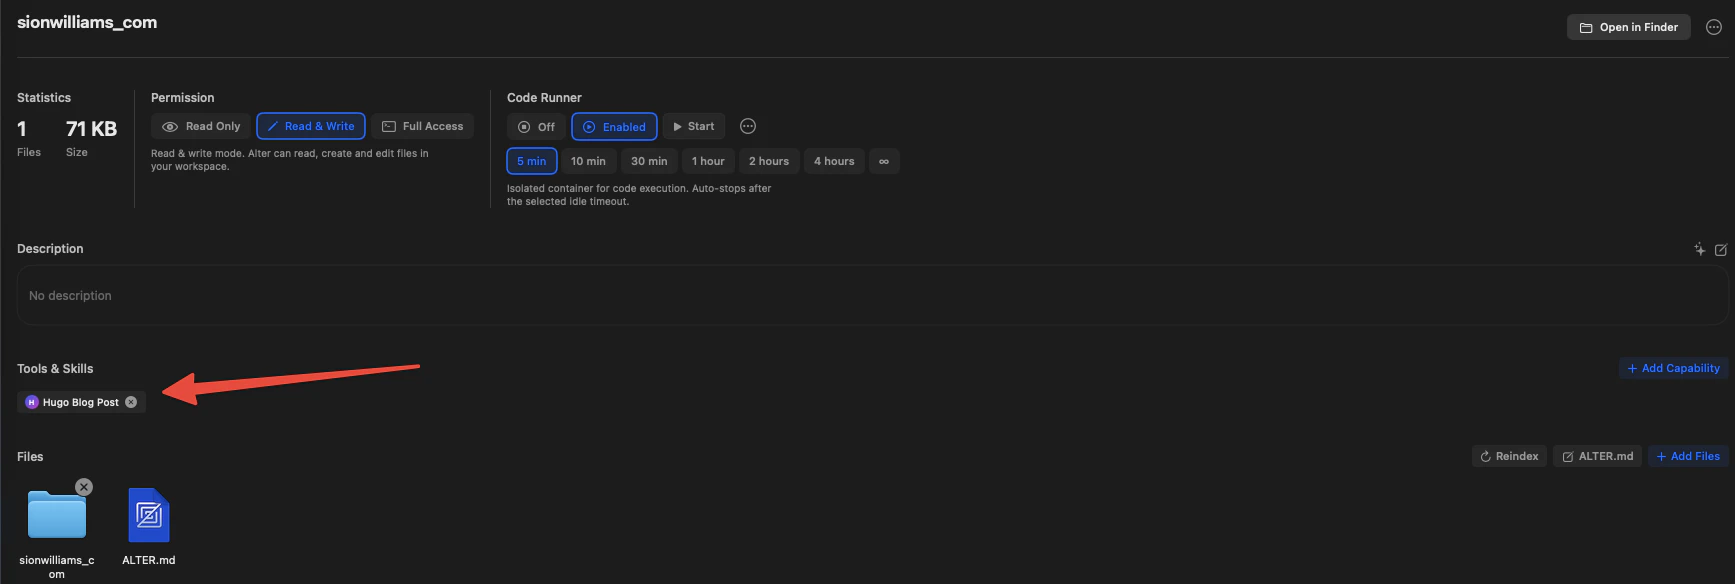
3. Import your custom skill into Alter
Once your skill is created, add it first to Alter then to your blogging workspace.Import the skill
In the Tools Manager, select “Agent Skills” and then “Import Skill”. Select the directory where your skill is located. This is what you created in the previous stage.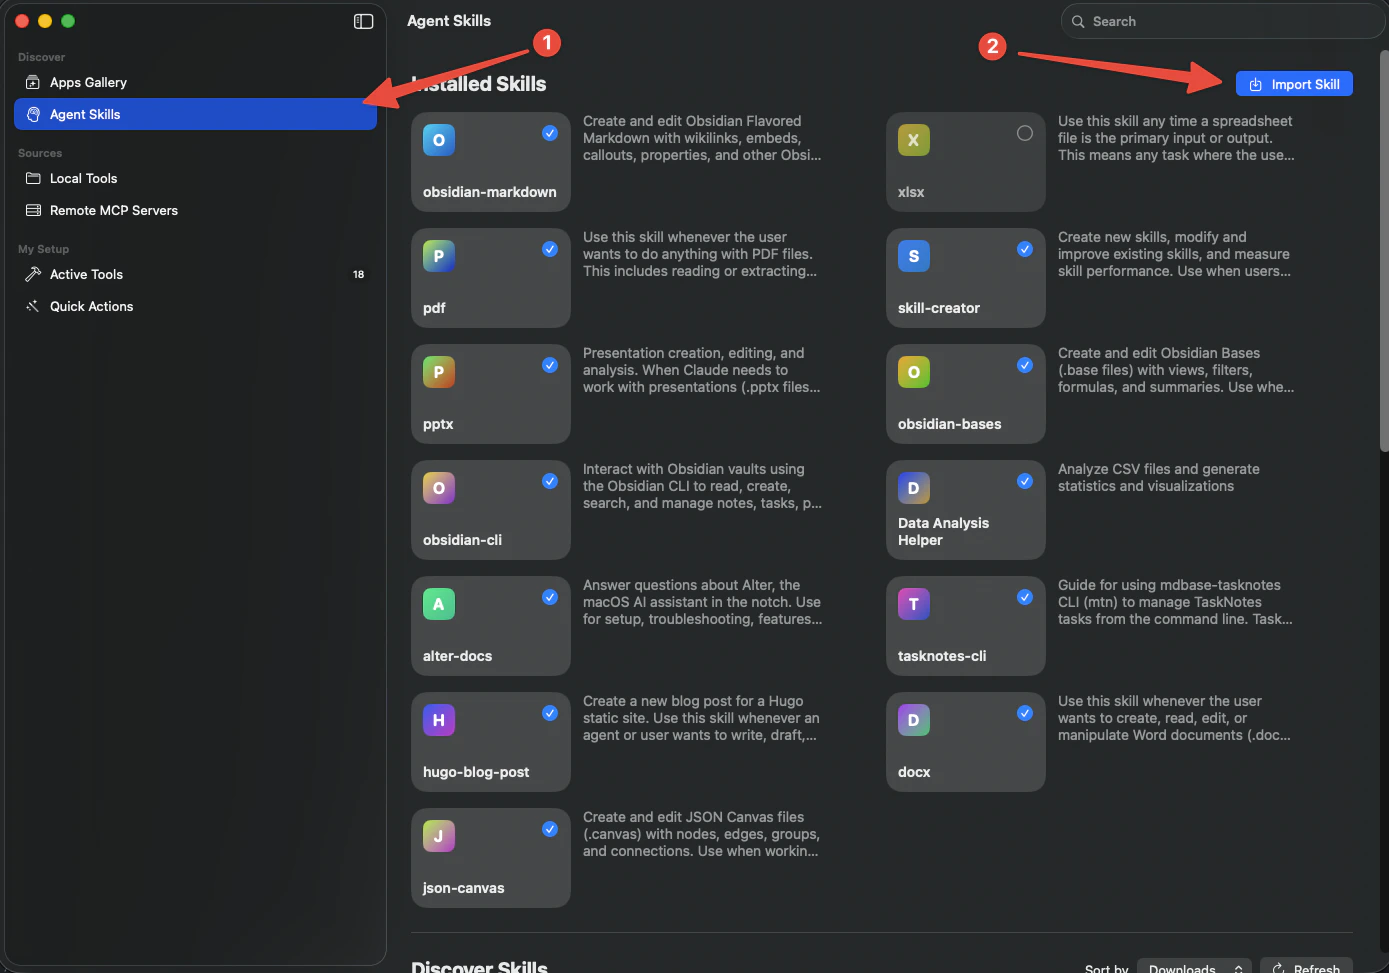
4. Create a mode to activate everything instantly
Modes let you switch your entire setup (workspace + skills) with a single hotkey.Open Action Editor settings
In Alter’s notch menu, find the Action Editor section (or Shift + , Cmd + E)
Configure the mode
- Name: “Blogging Mode” (or whatever feels right)
- Mode: Enable
- Workspace: Select your “Blogging Workspace”
- Hotkey/Trigger: Assign a memorable shortcut (e.g.,
Cmd + Shift + B)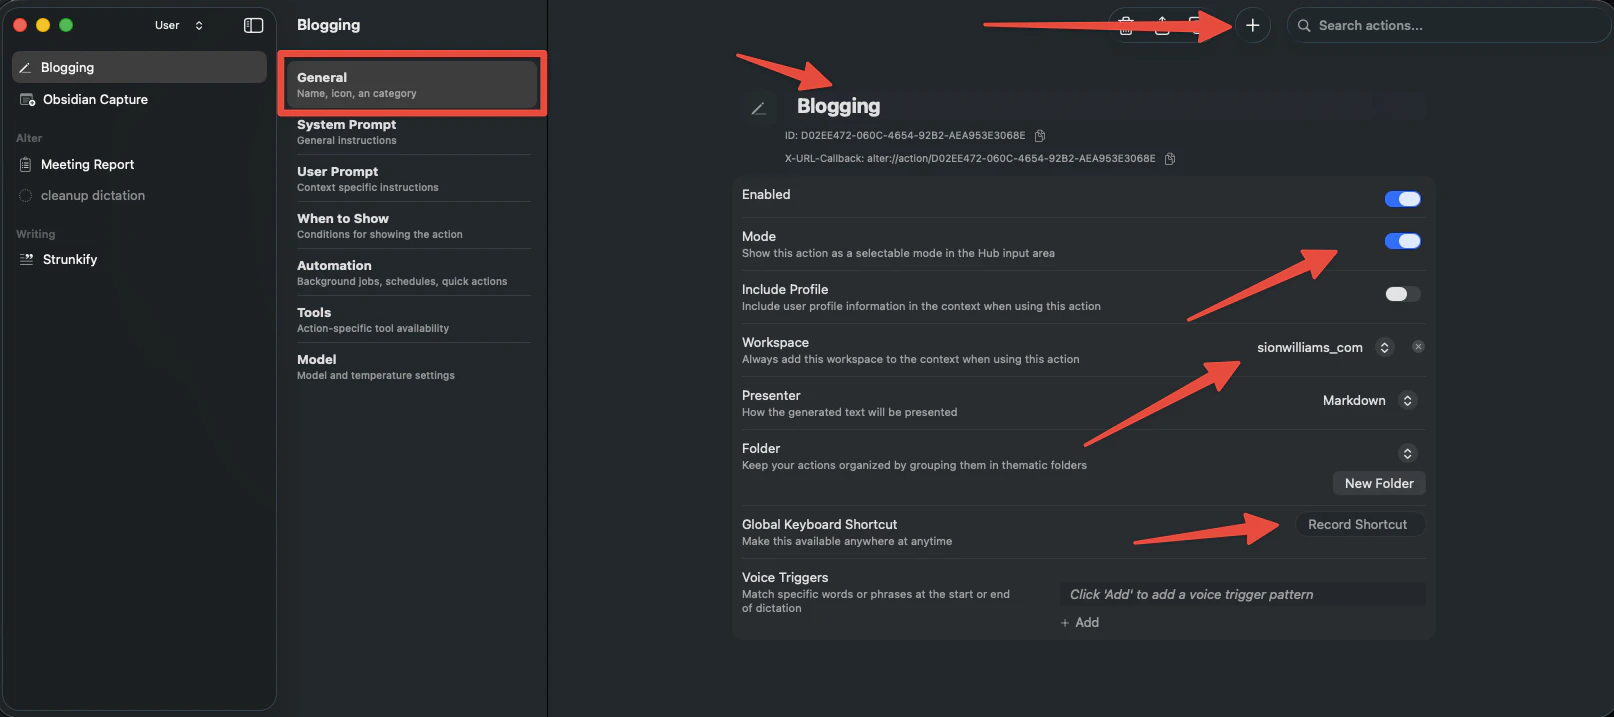
5. Use your workflow
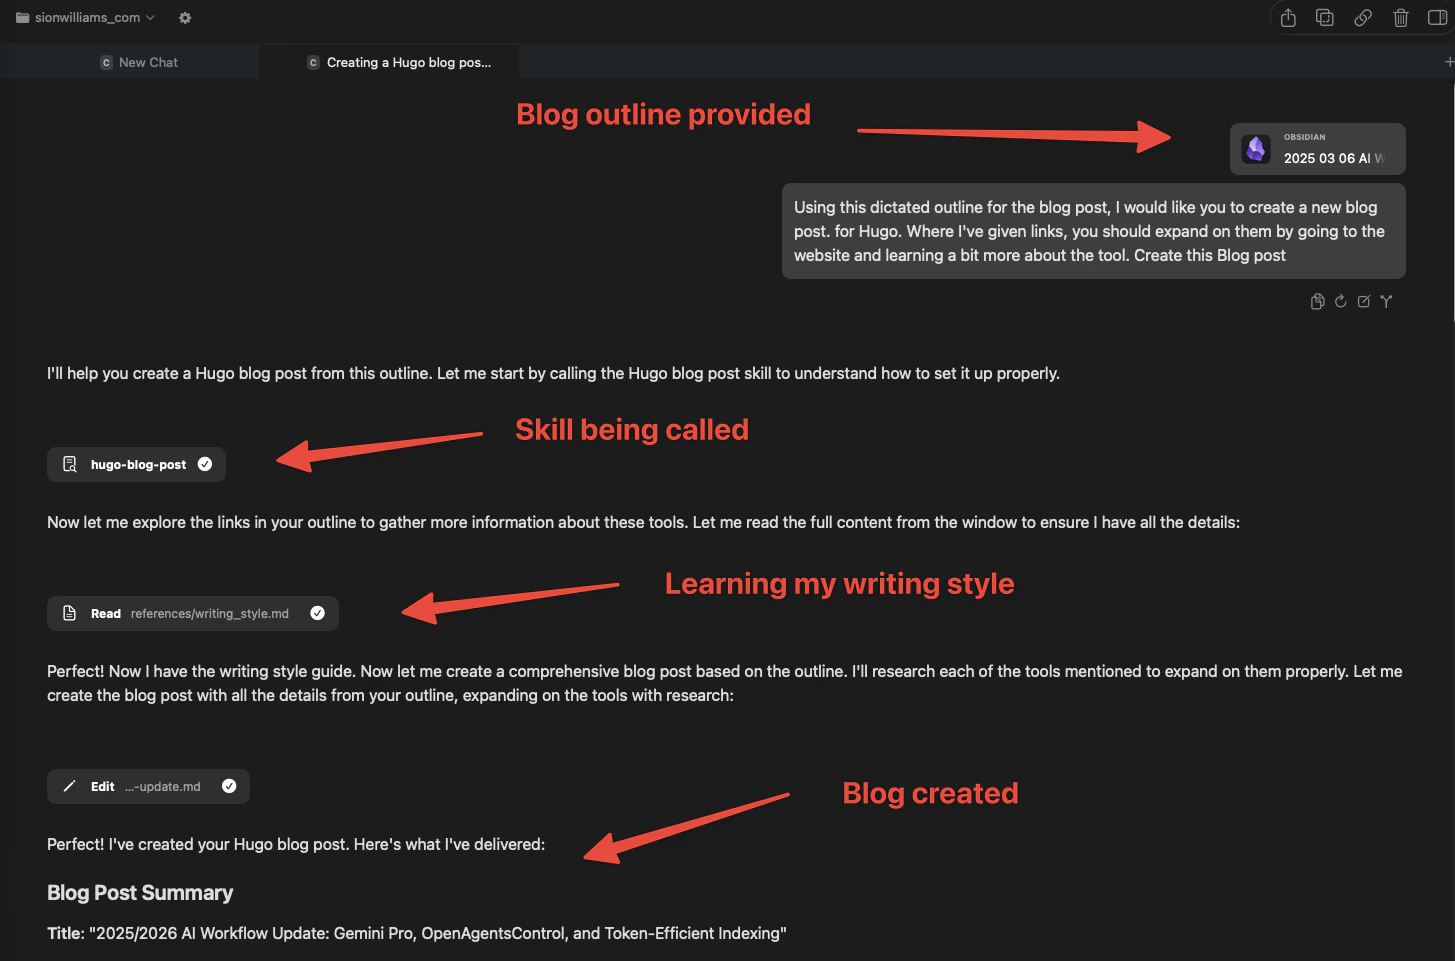
Now everything is wired up. Here’s how you actually use it: Your writing process:- Dictate or draft your raw thoughts in Obsidian, Notes, or a text editor
- Activate Blogging Mode by pressing your mode hotkey (e.g.,
Cmd + Shift + B) - Switch to Alter and ask something like:
“Using this dictated outline, create a blog post in my style.”
- Paste or reference your draft as context (using
@to link files or drag content in) - Review the output - it should sound like you, follow your format, and have proper depth
- Copy and publish to your blog platform
Why this pattern scales
You’re not relying on Alter’s guesses anymore. Because Alter has your actual writing samples and tone guidelines, it doesn’t need to infer your voice. It follows it. Consistency becomes automatic. Your skill keeps your voice consistent across every piece of content, whether you’re writing a blog post, social copy, or documentation. No more manual editing to fix the tone. You actually have time to write more. Without the overhead of re-explaining your style or endlessly editing generic AI output, you can focus on the thinking part - the ideas - and let Alter handle the execution. This works for any content type. Blog posts, marketing copy, internal docs, social posts - anywhere your voice matters, this pattern works. Just create a different skill if you need a different voice.Key learnings
- LLMs are voice-agnostic. They don’t know you. Teaching them who you are isn’t optional if you want to scale - it’s essential.
- Skills are how you teach them persistently. A skill with examples beats re-explaining yourself every time. It’s the difference between having a reference and starting from scratch.
- Context multiplies what the skill can do. When your workspace links to your actual project folder, Alter understands your structure, your file naming, your conventions. It’s not just guessing anymore - it’s working with real information about your ecosystem.
- Modes reduce friction to zero. One hotkey to load everything means the tool gets out of your way. You can focus on thinking, not setup.
- Start with one skill, then expand. Build your primary voice skill first (your blog, your main writing). Test it, refine it. Once that’s solid, create skills for other contexts (marketing, technical docs, social) where you need different voices.
Troubleshooting and refinement
Skill doesn’t sound like me:- Add more diverse writing samples to the skill
- Be more specific about tone (not just “conversational” - what does that mean in your context?)
- Update the skill instructions to emphasize your samples as the reference
- Your skill’s instructions might be too vague. Tighten the guidelines.
- Provide more structured input (bullet outline vs. rambling notes)
- Your raw content might need more detail for the skill to work with
- Add explicit formatting rules to the skill
- Include a correctly formatted example post in the skill’s context
Next steps
- Build your first skill: Start with 2–3 examples that best represent your voice
- Test the workflow: Create one post using this pattern, then refine based on what worked
- Expand gradually: Once blogging is solid, apply the same pattern to other content (marketing, docs, social)
- Read more:
- Skill creation documentation – Complete guide to building skills
- Alter Workspaces – How workspaces organize your context
- Dictation Guide – Voice capture to feed your skill (Note: this page also covers “Dictation Modes” which are different from Alter “Modes”)