

QuickHub is the default. New users get floating QuickHub for fast chat; use the Hub for deep work. See QuickHub Mode and Edge Bar.
Two Ways to Interact
The Hub
Full workspace with tabs, sidebar, and comprehensive management
QuickHub
Default floating panel for quick queries, attach workflows, and voice commands
General Concept
Alter provides two main interfaces for interacting with AI:The Hub
The Hub
The main window interface with tabs, sidebar, and comprehensive workspace management. Best for:
- Extended conversations
- Workspace management
- Multi-tasking with multiple contexts
- Reviewing meeting transcripts
QuickHub
QuickHub
The default lightweight panel (when QuickHub Mode is on). Open with ⌘⇧Space, from the Edge Bar, or attach beside any app with ⌃⌘← / ⌃⌘→. Perfect for:
- Quick queries
- Voice commands
- Fast context additions
- Side-by-side work with attach mode
The notch (legacy)
The notch (legacy)
When QuickHub Mode is off, hover the camera notch for the compact quick menu. Most users should keep QuickHub Mode enabled — see QuickHub Mode.
Hub Interface
The Hub is divided into three main sections:
- Sidebar - Navigation for conversations, workspaces, transcripts, and more
- Main Content Area - Tabbed interface showing active content
- Input Area - Prompt box and context management
Opening The Hub
1
Keyboard shortcut
Press
Shift + Cmd + H2
Menu bar
Select “Open The Hub” from the Alter menu bar icon
3
From a conversation
Open a conversation link from a floating panel
Tab Types
Conversations
Chat sessions with AI models
Workspaces
Collections of files, folders, and apps
Transcripts
Meeting transcriptions and recordings
Calendar Events
Scheduled meetings and events
Scheduled Jobs
Automated tasks and workflows
Split Panel
Split the Hub into two side-by-side conversation panes — each with its own tabs, prompt box, and context strip. Bridge context between panes by dragging context cards, using Add as Context to Other Pane, or typing@ to pick the conversation in the other pane.
Split Panel guide
Open split, move tabs between panes, and bridge context between conversations
Keyboard Shortcuts
Managing Contexts
1
Add context
Drag and drop files, or use
@ in the prompt box2
Navigate
Use arrow keys to move between contexts
3
Clear
Press
Cmd + Shift + X to remove all contextsInspector Panel
Conversation Details
Metadata, markdown export, and web share links
Context Management
See all contexts in current conversation
Workspace Info
Statistics, files, and settings
QuickHub Interface
QuickHub (the default when QuickHub Mode is on) is divided into three sections:1. Context
Your selected files, apps, and references
2. Prompt
Where you type or speak your request
3. Additional Selection
Quick access to models and actions
Navigation
Use keyboard shortcuts in QuickHub:←,↑,→,↓- Navigate between objectsEnter- Select an object@- Add elements to context#- Show conversation history>- Show meeting history/- List and choose model?- Show help menu
See the Prompt Box section below for more keyboard shortcuts.
The Context Section
The Context section displays elements sent to Alter for reference.Files
Documents, images, audio files
Text Selection
Selected text from any app
Transcripts
Audio and YouTube transcripts
Folders
Entire directories
Workspaces
Saved workspace collections
Applications
Current app context
Web Pages
URLs and web content
Keyboard Navigation
Using Your Clipboard
Paste content directly:Cmd + V
Your clipboard content is automatically added to Alter’s context.
The Prompt Box
The Prompt Box is where the magic happens.Start typing your prompt or an Alter Action title to send it to your AI model.
Keyboard Shortcuts
Help Menu

? in the prompt box to see all available shortcuts.
Conversation Windows
Resizing Windows
Customize conversation window size for your workflow:Width
Drag edges horizontally to resize
Height
Drag edges vertically to resize
Layout
Fit alongside other applications
Persistent
Size is remembered for future sessions
Useful for: Side-by-side work, reviewing long documents, screen sharing, different display setups
Continuous Speech-to-Prompt
Have extended voice conversations without touching your keyboard:1
Hold voice hotkey
Press and hold
Fn (or your configured key)2
Speak naturally
Say your prompt out loud
3
Release
Let go to send to conversation
4
Keep going
Each voice prompt adds to the same thread
Conversation History
Managing Chat History
Access history by typing# in the prompt box or using The Hub’s sidebar.
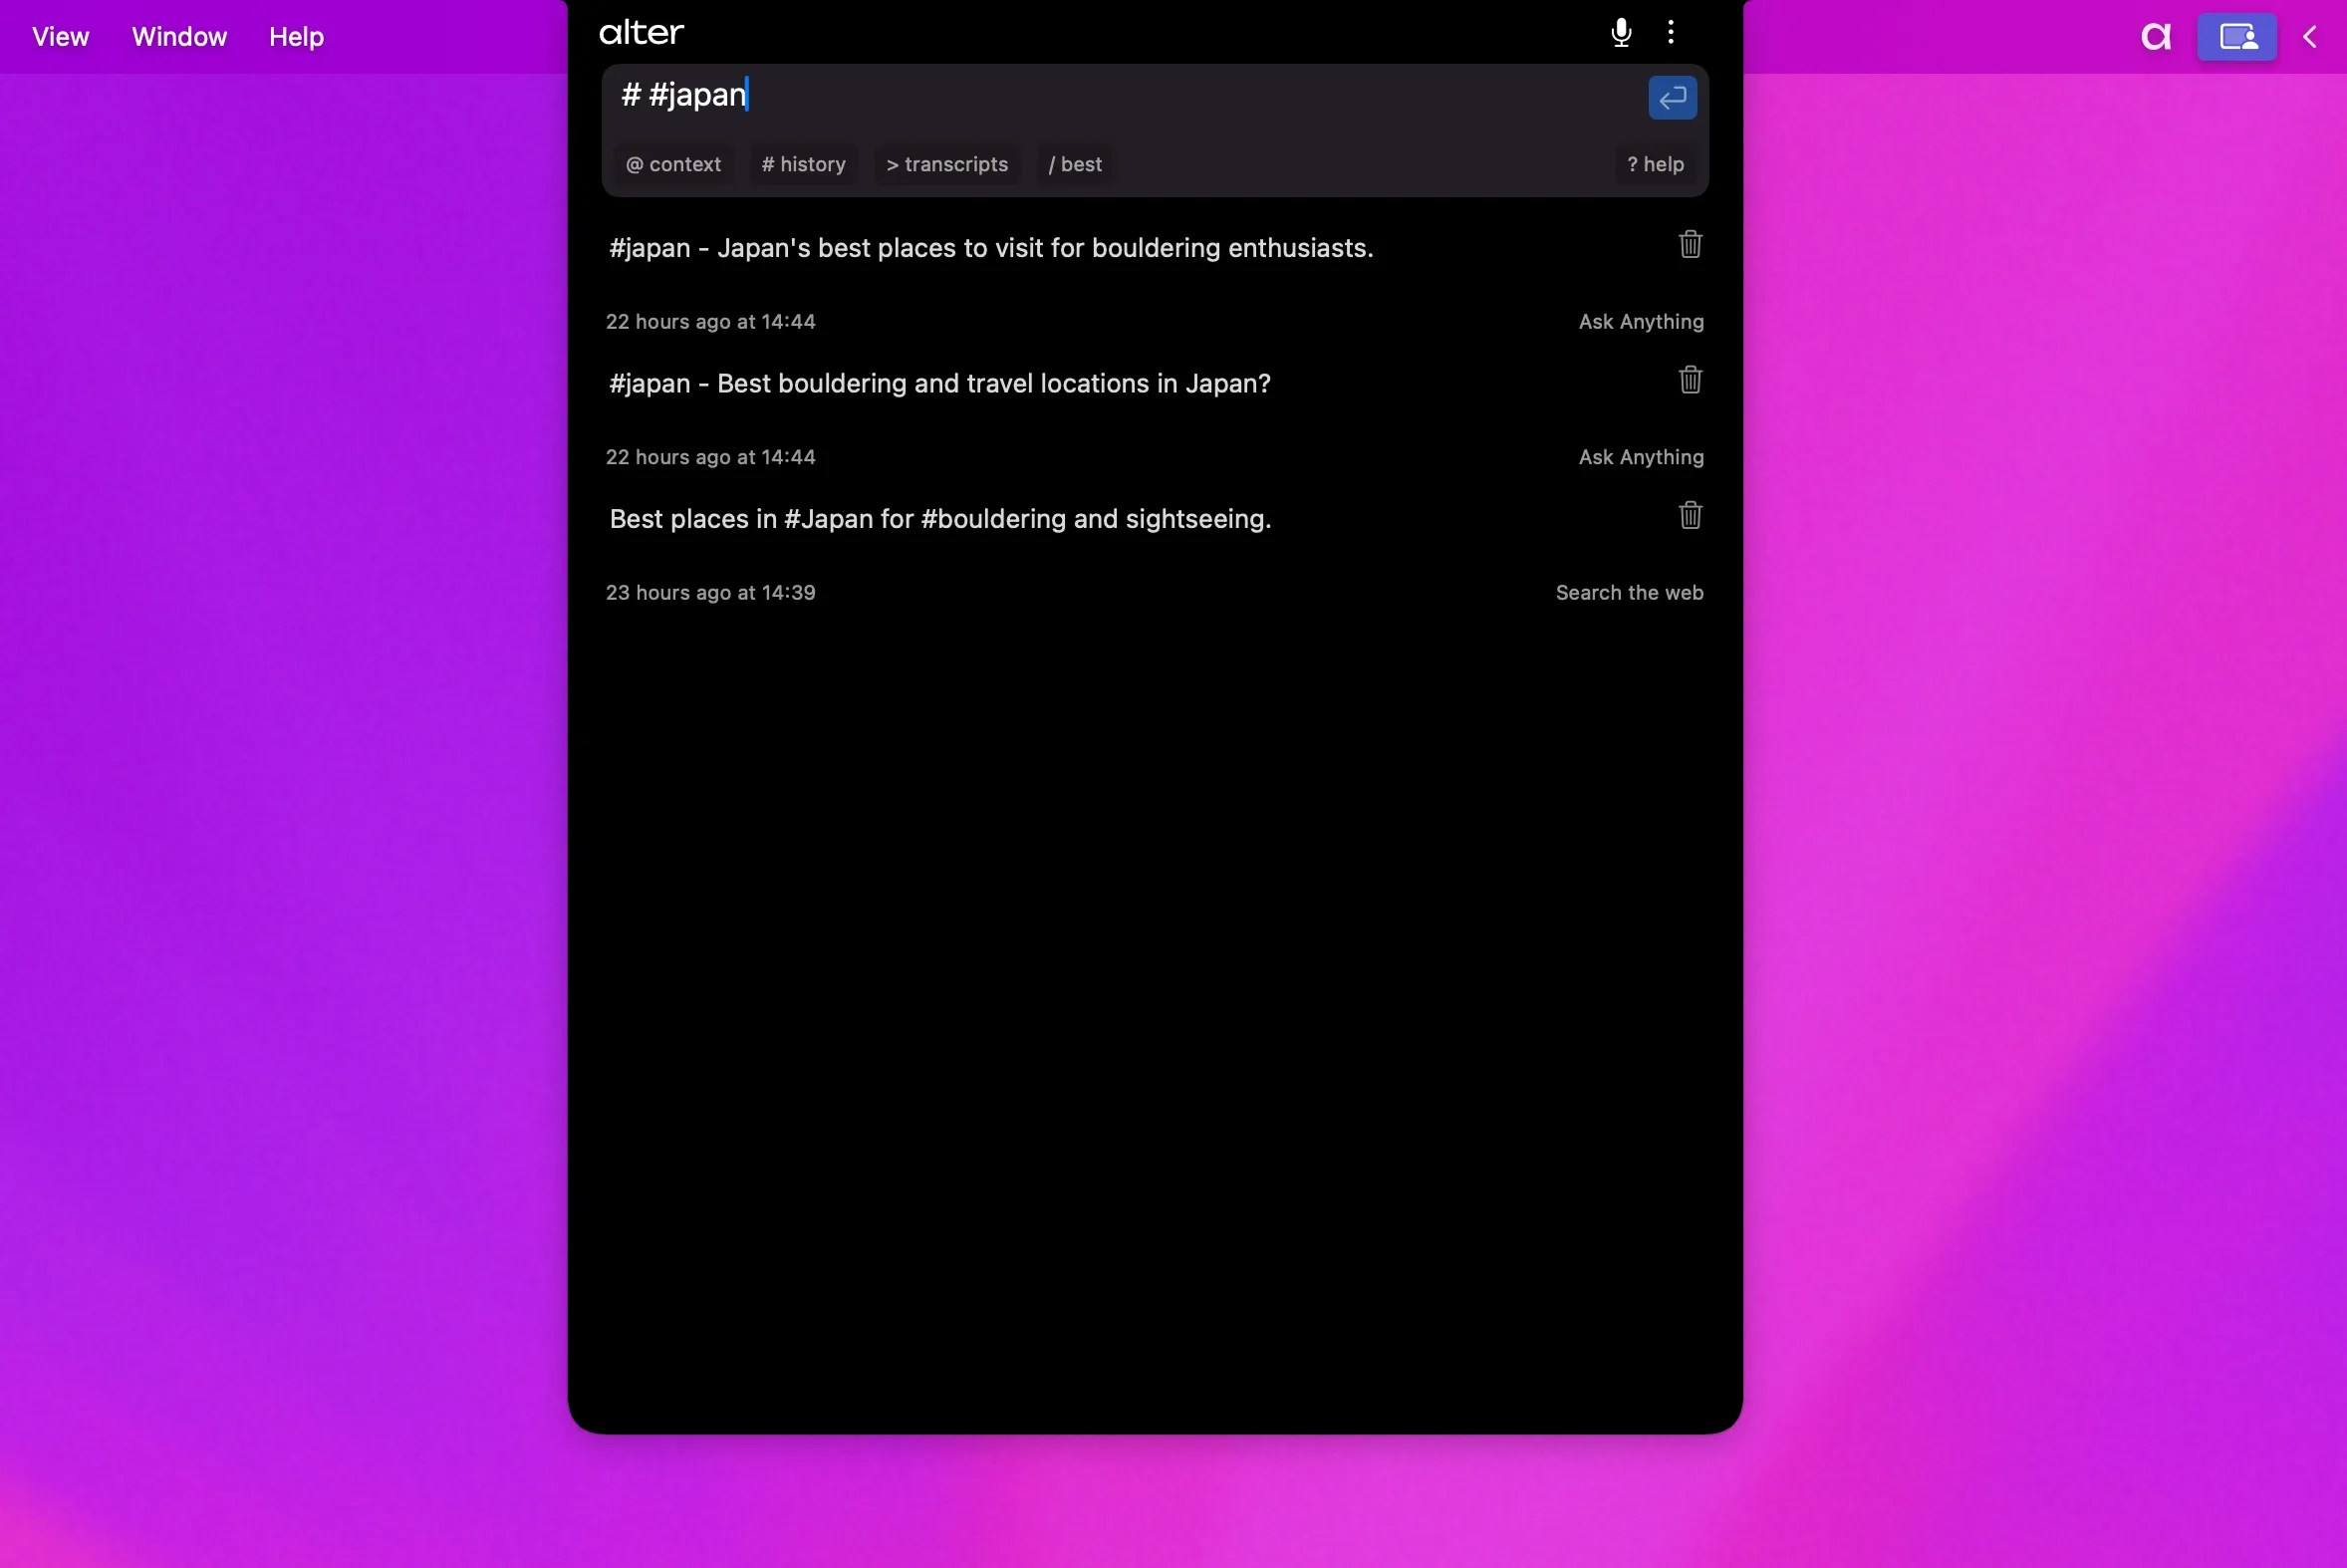
Search and filter conversations
Find inside the open chat Press ⌘F in the Hub or QuickHub to search the current conversation. Use ⌘G and ⇧⌘G to jump between matches. The find bar stays scoped to the active tab. Search all Hub history Press ⇧⌘F (default) or click the sidebar search field to search across saved conversations and meeting transcripts. Results update as you type. Alter indexes history in the background; Doctor shows indexing progress when a rebuild is running. Filter the sidebar Click the filter icon in the Hub sidebar to narrow the conversation list:
Each group supports All / None shortcuts inside the filter popover. Filters persist while the Hub is open and help when your history spans many workspaces or actions.
Jump through long Hub chats
In the Hub, a turn index appears beside longer conversations. Click a turn number to scroll directly to that message exchange without losing your place in a deep thread.
Organizing with Tags
Add tags like#personal to categorize chats:
Renaming Conversations
1
Right-click
Right-click any conversation in the list
2
Select Rename
Choose
Rename from the menu3
Type new name
Give it a descriptive name
Export Hub conversations and share on the web
Alter offers two ways to get a Hub conversation out of the app:Save as Markdown
1
Open the conversation
Select it in the Hub sidebar or an open tab
2
Export
Use Save Conversation as Markdown from the Hub menu, or press ⌘⇧S (default)
3
Save
Choose a location — Alter writes a
.md file you keep locallyShare on the web
From the Hub sidebar (right-click), the conversation tab menu, or the command palette (Share Conversation):- Confirm the public-link warning
- Alter uploads the discussion and copies the URL to your clipboard
- Use Copy link, Update, or Remove from the Share submenu when a link already exists
Not the same as Share trace
Share trace lives in the Tool Inspector after a task run (Computer Use, Flow, and similar agents). It uploads diagnostics to Alter support — it does not publish a public link. For that workflow, see Share task traces.
Right-to-left conversations
When macOS uses a right-to-left language layout, Hub and QuickHub conversations follow that direction automatically. Message order, the turn index, and context cards respect the active interface direction — no separate Alter setting is required.Related Resources
QuickHub Mode
Default UX, attach/detach, and shortcuts
Edge Bar
Screen-edge launcher and Computer Use sessions
Core Features
Workspaces, Actions, and more
Keyboard Shortcuts
Complete shortcut reference